This post will focus on the details of the poster itself, the time invested in creating it and whether I was successful in achieving any of my goals.
The first task was to create the poster itself and provide some space for the multimedia stuff. At first I thought that a giant QR code in the middle of the poster -and nothing else- would be a great way to stir up an otherwise boring poster session, but thought again on how crass that might come across to those who are less tech-savvy.
The Poster
I designed the 44x44 inch poster within Power Point. Here is a snippet jpg of the poster I eventually created.

Some things of note:
- Note how little space I devoted to the names and affiliations. Posters should not be self-congradulatory, but credit should be given when and where it is due. If someone wants to contact me, a business card seems efficient. I left a bit of space above the bottom right icons for my business cards that I will pin to the poster.
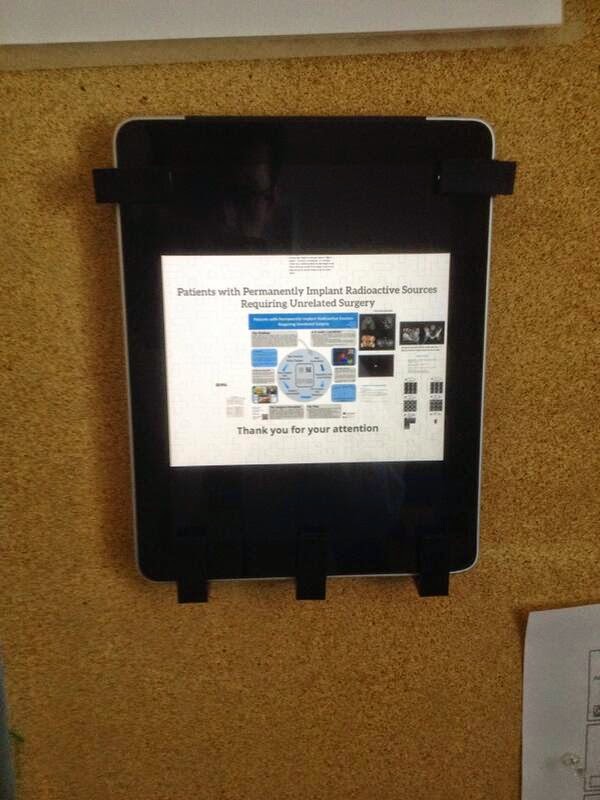
- The square in the middle of the poster is where my 1st generation iPad will reside. With copious amounts of velcro and tape, I hope it stays up. I will cut out some horizontal strips on the poster itself so as to expose the backing of the poster panel. On the poster panel, I plan to attach velcro strips matching in position with the velcro on my pad. Voila! (I'll show pictures of the final product). I wanted to give some empty space between the iPad and the rest of the poster.
- I tried to keep the poster symmetrical and balanced. There are only about 3 colors.
- Hopefully the arrow gives the reader some direction on the poster contents. I recognize now that the arrow probably isn't large enough, or it still is a bit ambiguous which direction the reader's eyes will follow. I guess to each their own!
The QR Code - Prezi Link
The major 'multimedia' bit is the QR link to Prezi. Here is the link to the Prezi. Since I'm faculty at University of Victoria, I have academic account with Prezi. If you haven't tried it, you should: it is fun to use.
I thought that the simplest way to tell the poster's story but with multimedia bits was through a Prezi, where I could easily insert movies, PDFs and other images to supplement the poster. Furthermore, you can program the Prezi to auto-run the movie loops, and even auto run the entire presentation. I decided against the latter, hoping to pass control to the viewer/user (and have a level of interaction with the poster outside of just reading the content).
I decided to try to track links to the Prezi and other media by using a google URL shortener. The funny part of creating the QR codes and other links was that I was trying to create a permanent link for material that isn't completed yet! So I had to ensure I had only one (repeatedly edited) version of the Prezi itself. This was the same for the links to PDFs or other content I intend to share, but haven't finalized yet (all available on my publicly accessible Google Drive).
I could have chosen sharing the contents through slideshare, but given that this is not a slide-driven presentation, I liked the idea of using Prezi as a macroscopic poster, which contains the conference poster itself.

So at the centre of the Prezi is the poster, but supplementing all aspects of the poster are the bits I can't fit into the poster. The user can either self-direct by zooming in on different parts of the Prezi, or they can follow the trajectory of the Prezi while in presentation mode. This was relatively easy since I could pretend I was providing an oral presentation by zooming in on the bits on the poster and linking to the multimedia chronologically. The layout was feeling quite 'meta', since there is a QR code for a link to the Prezi within the Prezi itself (!).
The QR code is primarily for those with smart phones who have a QR reader on it or intend to take a picture of the code to use later on. The 'goo' link then takes them to the Prezi site. If the user has a smart phone, they can watch the Prezi through their web browser; or, for a better experience, download the Prezi App and view it.
Because I can't expect everyone to be experts at viewing Prezi, I inserted some instructions on the Prezi itself:

Other tid-bits
On the bottom left corner I provided links to all the multimedia accessible:
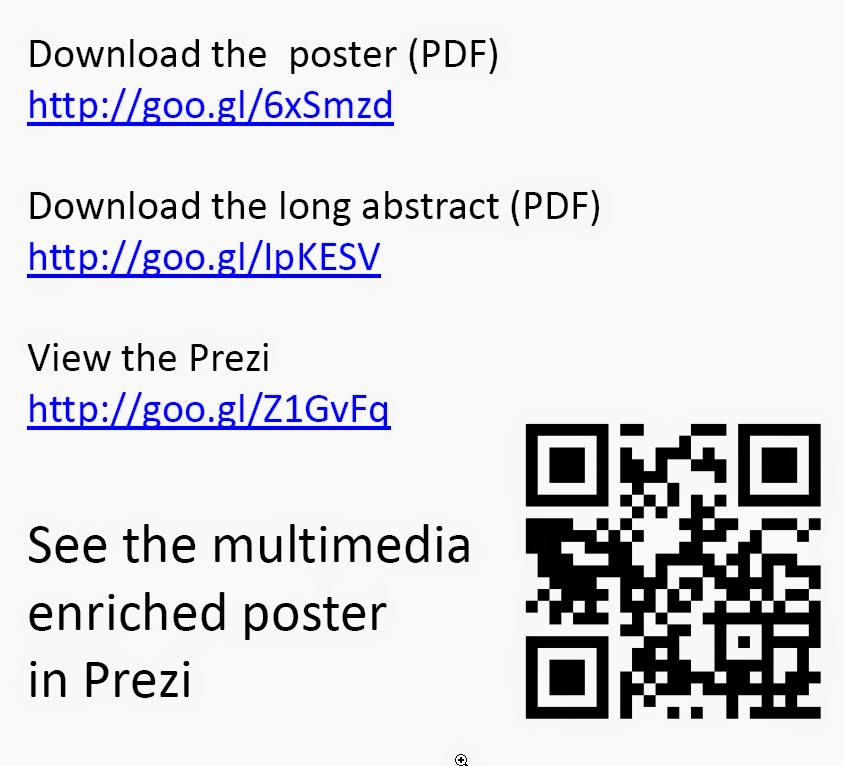
People who want to view the poster in more detail or perhaps don't have time to view it can do several things here, such as scribbling down the url for future reference, or if they have a smart phone, take a picture of the text so they can refer to it later. I deliberately shortened the URLs, again to economize on space, and to track how many downloads occurred. I provided the QR code on the bottom as well as the middle since there may be times during the conference when the QR code in the centre will be concealed by the iPad (see later).
I also created a YouTube video of the presentation (located here), but decided not to put this on the poster. I may put it on the Prezi as a link for others. But the question is what value will the YouTube video bring to the user? Because I don't have any more content than that in the Prezi, the YouTube only provides a narrative 'infomercial', which might be nice, but doesn't really add substantial scientific value. So I decided against it. (Aside: my primary goal here was to test out some software I purchased, ScreenFlow, and get some experience with it. It is a nice piece of software that is very helpful in creating "how to" videos and such. It is also helpful if recording, say, a video conference session that you'd like to share at some other time.)
The iPad
The primary purpose for the iPad is to provide a convenient vehicle for displaying the Prezi itself. I downloaded the Prezi app on the iPad and linked it directly to this presentation. There were a few problems I foresaw:
- Some may like to use the iPad for ulterior purposes: I need to find a way to ensure that only the Prezi is displayed and the user cannot access anything else.
- While I trust that most attending the scientific conference are not the thieving-type, I had to have some way of securing the iPad to the poster.
- Finally, I need to ensure that the poster can mounted by the poster. This I intended to do with Velcro strips
I had to be creative in addressing this since I have little money to spend (on such as this). After some surfing on the web, I found out that the newer generations of the iPad software have what I need: Guided Access (see this for a description). But because my iPad is so old Apple won't let me upgrade my iOS -and I am on a shoestring budget- I had to be more creative. I decided to create some type of frame around the iPad that physically prohibits the user from touching the home button as well as anything else that might result in exiting the Prezi.
Having access to a machine shop was indispensable for this project (Thanks Steve!). We found about 8 unused U-shaped pieces of lightweight plastic that I though could be used to help frame the iPad. They look like binder clips, about 2 inches long, 1 inch wide, and flat. They're just long enough such that when positioned around the iPad, they can block access to the home button. The trick is to find a way to secure it to the iPad. I put Velcro on the inside of the clips and the matching Velcro directly on the back of the iPad itself. I taped the back of the clips together so they were an array of clips on either the bottom or top of the iPad, with Velcro on it. It is very tricky and difficult to pry these pieces off the iPad. So I now only need to worry about securing the array of clips to the poster, and providing a means of tethering the iPad to the poster. I tested whether the weight of the iPad could be supported with Velcro and was pleased to find it could do the job.


Still, the Velcro isn't enough of a deterrent for someone with a strong desire to steal the iPad. So I needed to find a way to secure it to the poster panel itself.
Most conference poster panels are on wheels and typically have steel supporting bars on the sides. My plan was to loop around a cable around one of the bars, and secure an end of the cable to the iPad. I was thinking of using a laptop lock (something like this) and drilling a small hole on the little U-shaped plastic bits to match the dimensions of the little slots you find on laptops. I visited a local computer shop close to our centre (thanks Simply Computing!) to purchase one of them, but got to chatting with the fellow who works there. I was actually more interested in the tethers they use in the store to secure their own products! They have a wire cable attached to a plastic part that has a strong adhesive which attaches directly to the product they want to secure. They had some spares lying around that were not going to be put to use and kindly donated one to me. My plan is to attach the adhesive part to the plastic U on the bottom right corner, and wrap that cable around the poster's steel bar.
Once I have the final product up and running, I will take a few pictures and share them.
Total Time Spent
Poster design ~ 20 hours
Creating the Prezi ~ 4 hours
Creating the multimedia ~ 6 hours
Rigging up the method of securing the iPad ~ 2 hours
Total time spent ~32 hours (over budget :)
Having access to a machine shop was indispensable for this project (Thanks Steve!). We found about 8 unused U-shaped pieces of lightweight plastic that I though could be used to help frame the iPad. They look like binder clips, about 2 inches long, 1 inch wide, and flat. They're just long enough such that when positioned around the iPad, they can block access to the home button. The trick is to find a way to secure it to the iPad. I put Velcro on the inside of the clips and the matching Velcro directly on the back of the iPad itself. I taped the back of the clips together so they were an array of clips on either the bottom or top of the iPad, with Velcro on it. It is very tricky and difficult to pry these pieces off the iPad. So I now only need to worry about securing the array of clips to the poster, and providing a means of tethering the iPad to the poster. I tested whether the weight of the iPad could be supported with Velcro and was pleased to find it could do the job.
Still, the Velcro isn't enough of a deterrent for someone with a strong desire to steal the iPad. So I needed to find a way to secure it to the poster panel itself.
Most conference poster panels are on wheels and typically have steel supporting bars on the sides. My plan was to loop around a cable around one of the bars, and secure an end of the cable to the iPad. I was thinking of using a laptop lock (something like this) and drilling a small hole on the little U-shaped plastic bits to match the dimensions of the little slots you find on laptops. I visited a local computer shop close to our centre (thanks Simply Computing!) to purchase one of them, but got to chatting with the fellow who works there. I was actually more interested in the tethers they use in the store to secure their own products! They have a wire cable attached to a plastic part that has a strong adhesive which attaches directly to the product they want to secure. They had some spares lying around that were not going to be put to use and kindly donated one to me. My plan is to attach the adhesive part to the plastic U on the bottom right corner, and wrap that cable around the poster's steel bar.
Once I have the final product up and running, I will take a few pictures and share them.
Total Time Spent
Poster design ~ 20 hours
Creating the Prezi ~ 4 hours
Creating the multimedia ~ 6 hours
Rigging up the method of securing the iPad ~ 2 hours
Total time spent ~32 hours (over budget :)
Did I achieve my goals?
It is hard to say whether this is a successful project or not at this point. I largely depends on the feedback from others and figuring out whether it actually works out or not. I'll make a quick blog post on the final product and then a more lengthly one after I've had a few weeks to reflect on the experience.
No comments:
Post a Comment